This tutorial will show you how to run Playstation (PS1, PSX, PSOne) games on your SNES Classic Mini. You will be able to add and play PS1 ROMs on your SNES Classic Mini. We will also show you how to install PS1 BIOS files to your SNES Classic to improve the performance of PS1 games on your mini console. Let's get started.
Before you begin, since PS1 ROM files are huge (usually larger than the capacity of the SNES Classic), you will need to install the USB-Host mod which allows you to add extra storage to your console with a USB drive. Read our tutorial here.
This tutorial is the same and works for both the SNES Classic Mini and NES Classic Mini.
How-to Play Playstation Games on Your SNES Classic
If you have already installed hakchi2 CE to your console, connect your console to the computer, turn it on, and open hakchi. Wait until your console is Online then skip to step #5.
![]()
1. Download hakchi2 CE (hakchi2-CE-#.#.#-release.zip) and extract it to your computer.
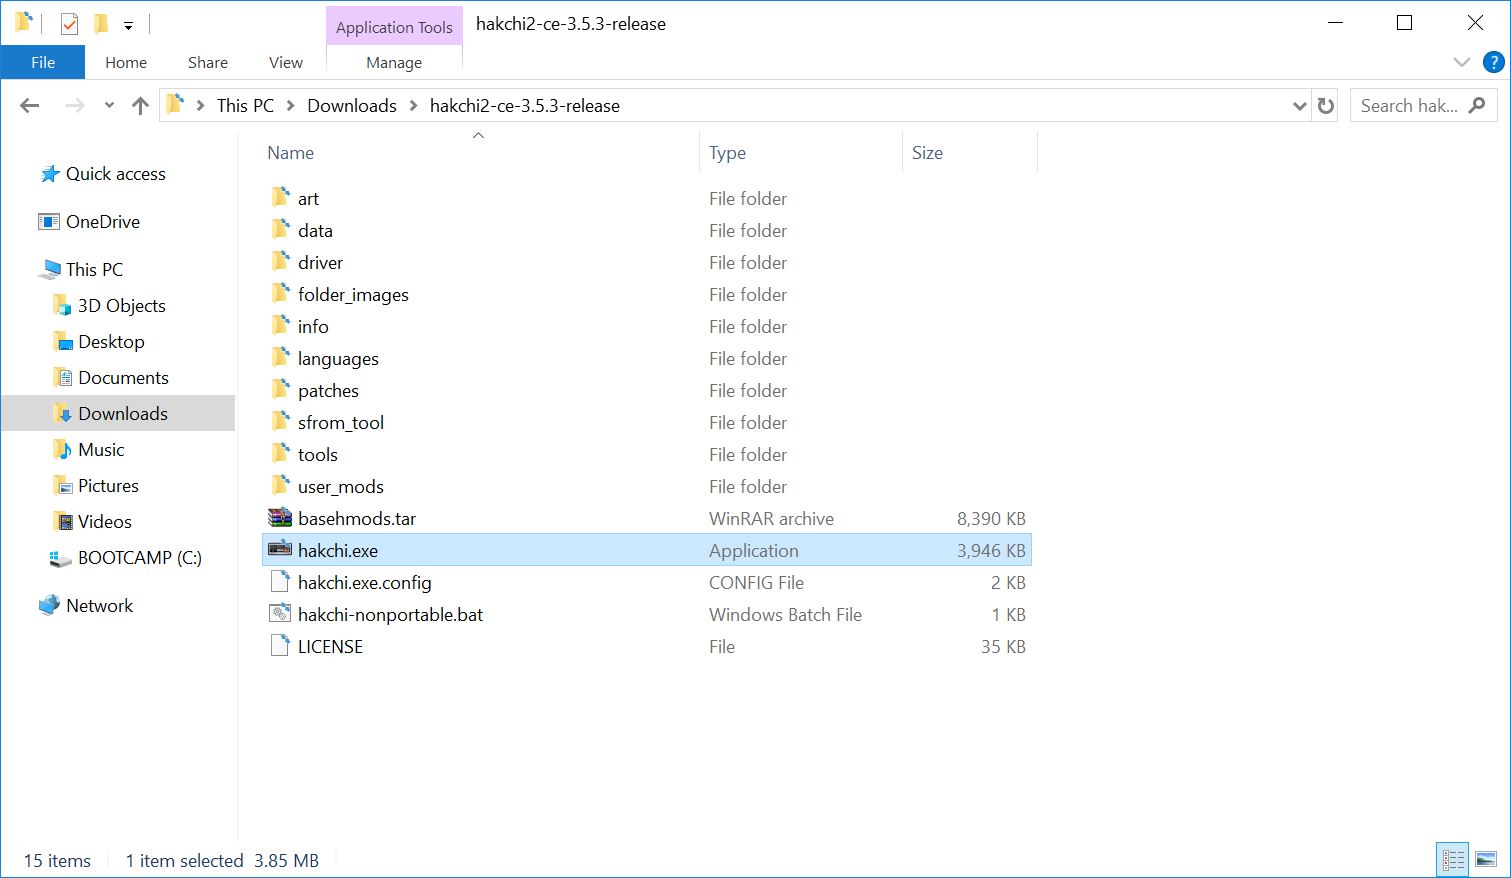
2. Run hakchi.exe.
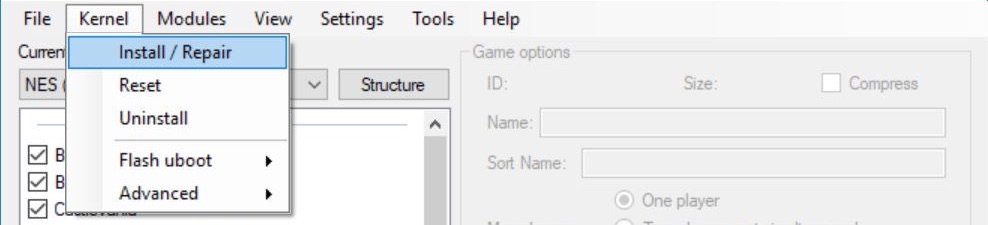
3. Go to Kernel > Install / Repair and hit Yes.
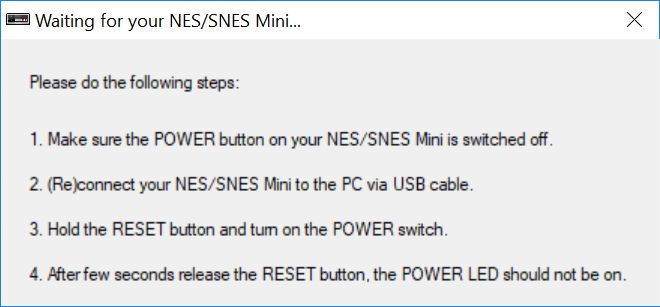
4. If this is your first time, you will be prompted to install drivers. You will only need to do this once. Now follow the steps on the screen - connect your console to your computer, hold the reset button and turn on the power switch, and then release the reset button after a few seconds.
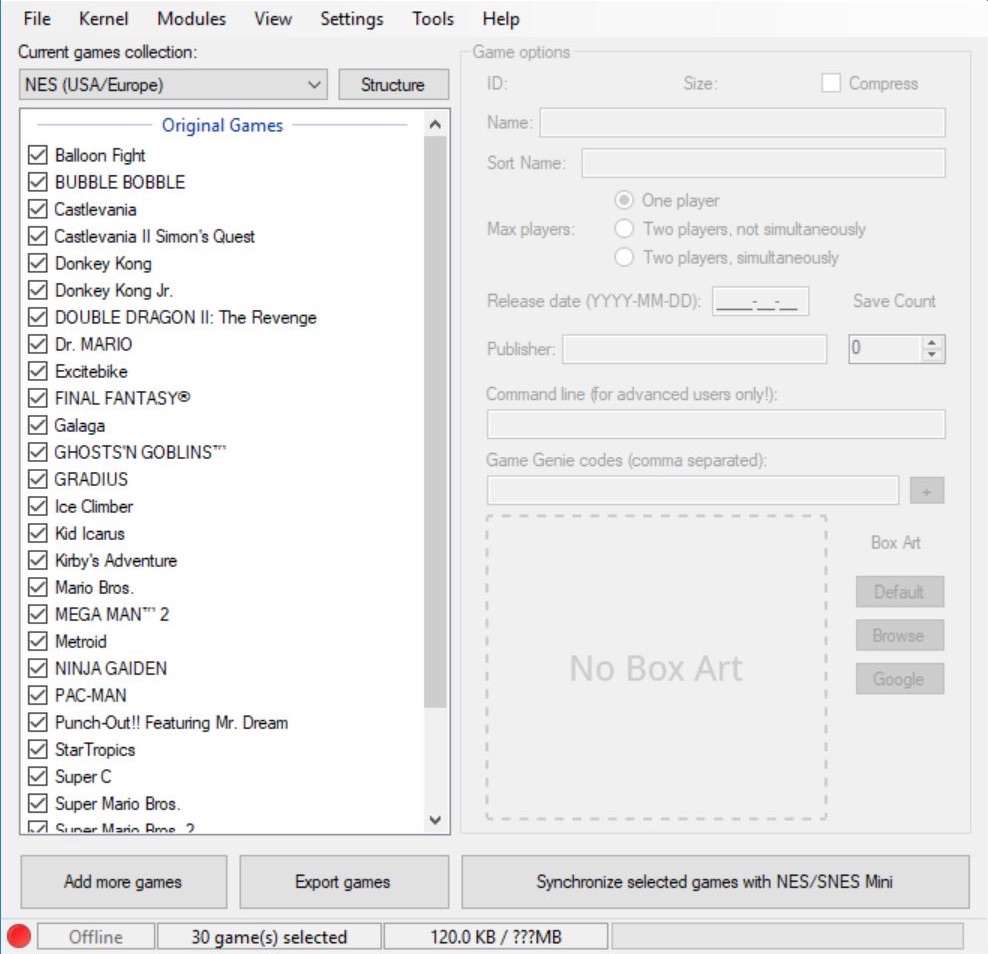
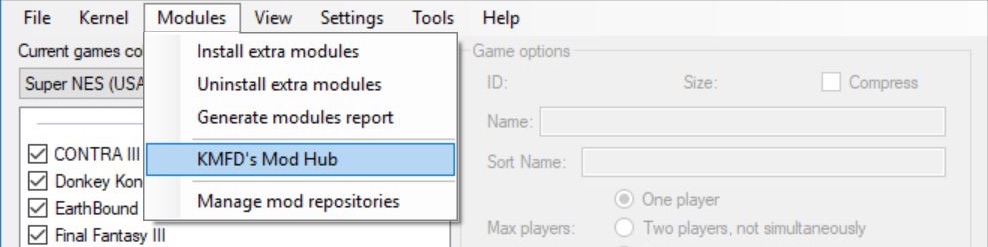
5. Go to Modules > KMFD's Mod Hub.
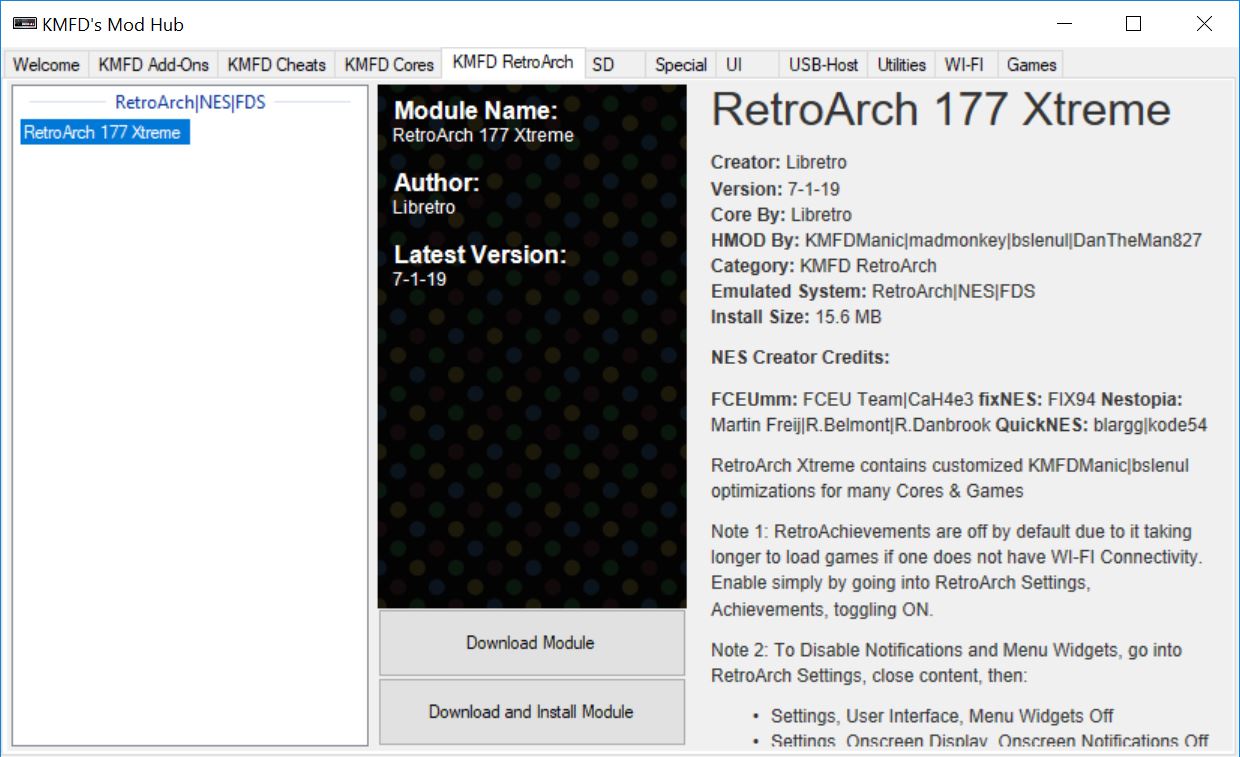
6. Go to the KMFD RetroArch tab, select the latest version of RetroArch, and hit Download and Install Module.
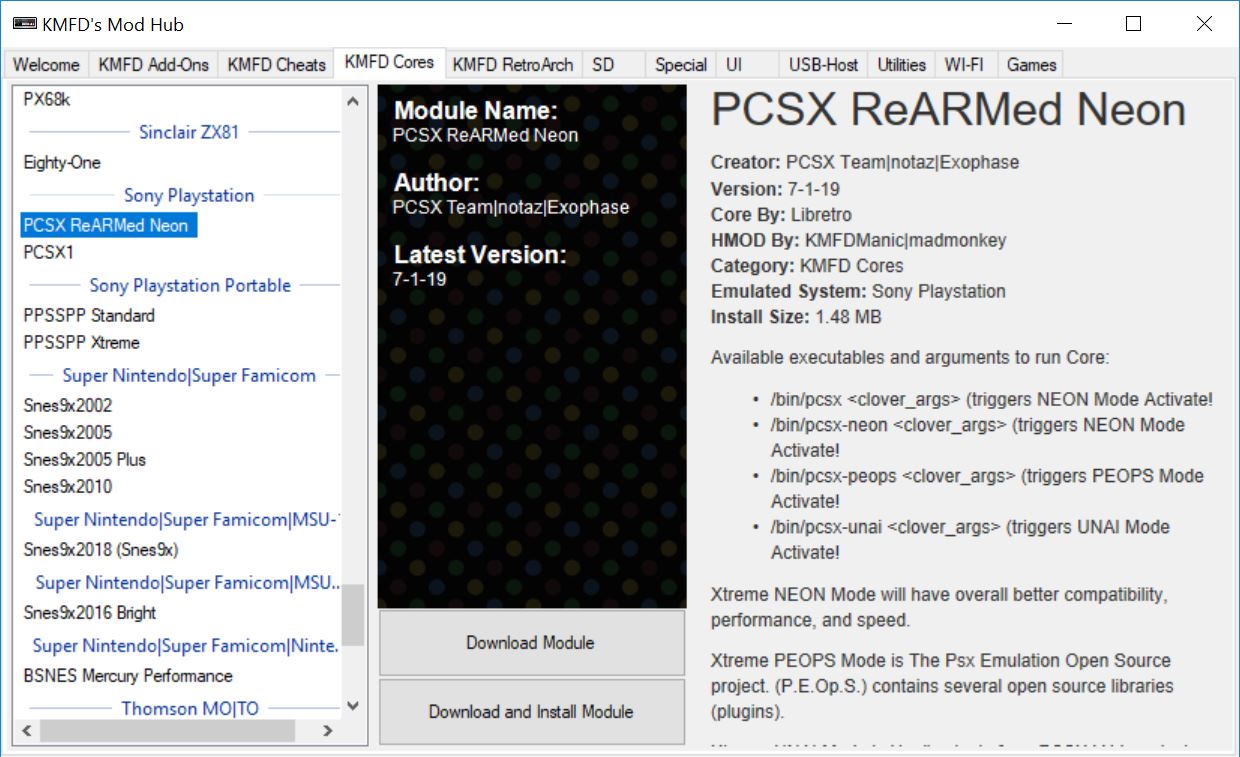
7. Go to the KMFD Cores tab, select PCSX ReARMed Neon, and hit Download and Install Module. Now exit out of KMFD's Mod Hub.
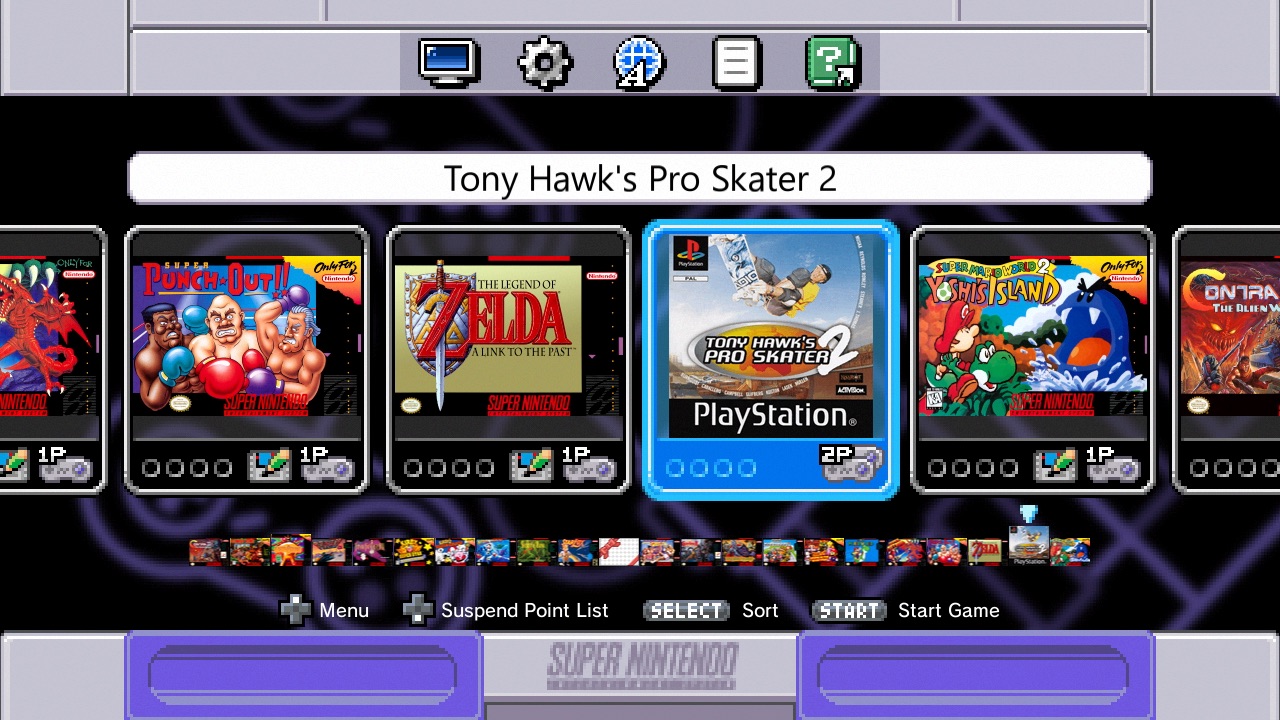
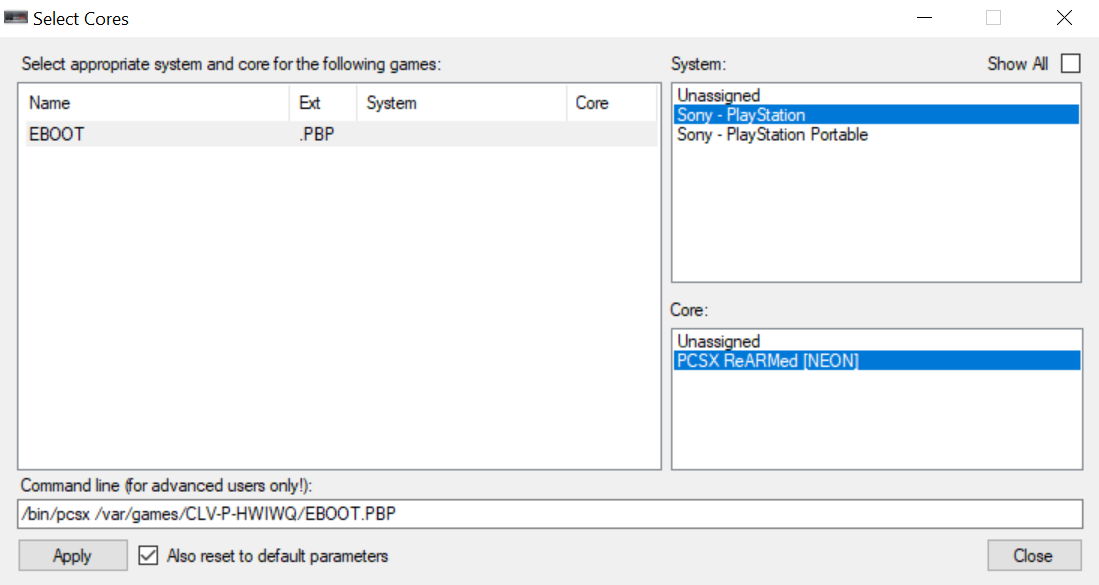
8. Hit Add more games and add your PS1 ROMs. The ROM should be a .PBP file. If the file is in another format, you will need to convert it to a .PBP file using PSX2PSP.

9. Highlight the file name and select Sony - Playstation under System, then select PCSX ReARMed [NEON] under Core. Hit Apply then Close.
10. *OPTIONAL* Edit the game name, box art, etc.
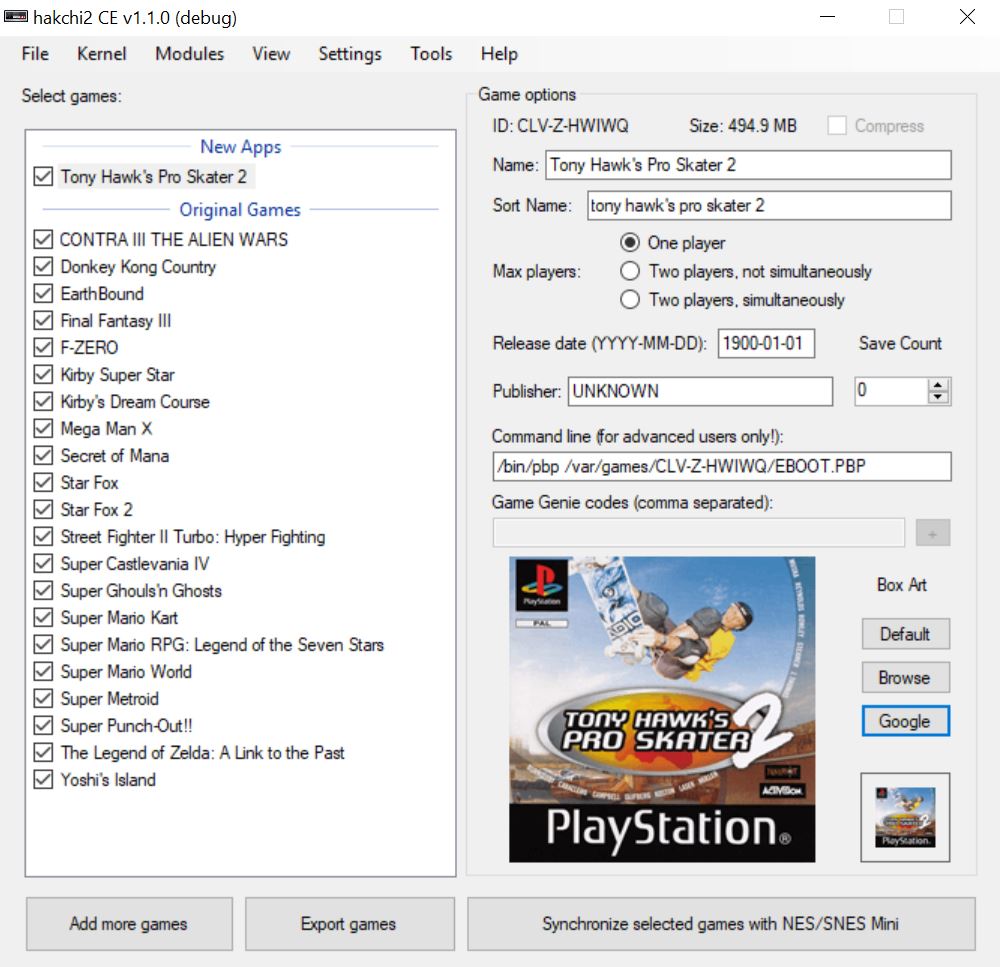
11. Insert your USB drive to your computer and hit Export games.

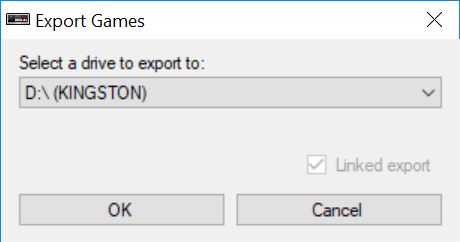
12. Select your USB drive and hit OK.
You are done. Connect your USB drive to your SNES Classic and turn it on.
Mapping PS1 Controller for SNES Classic Mini
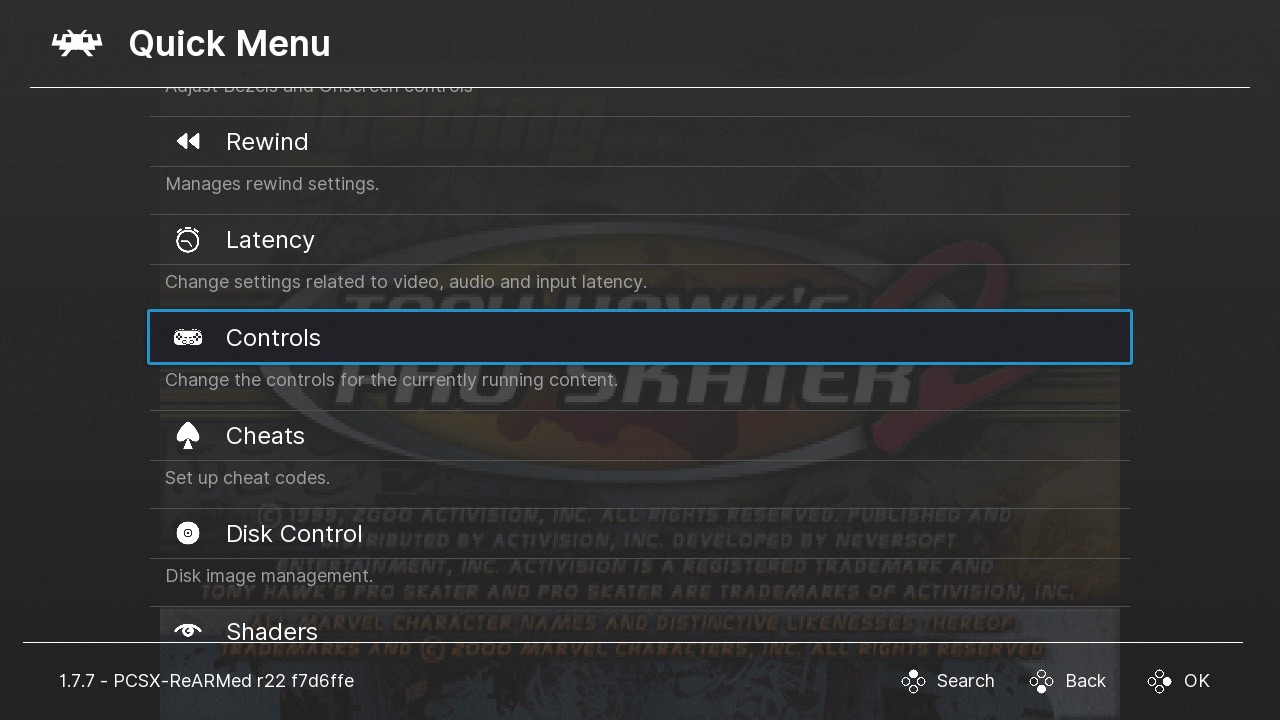
13. Launch the game and press Start + Select to open the Retroarch menu and go to Controls.
We recommend using a Wii Classic Controller Pro to play PS1 games on the SNES Classic.
Switching Game Disc
Many PS1 games are multi-discs and requires you to change CDs at certain points. This tutorial will show you how to switch disc in RetroArch on your SNES Classic.
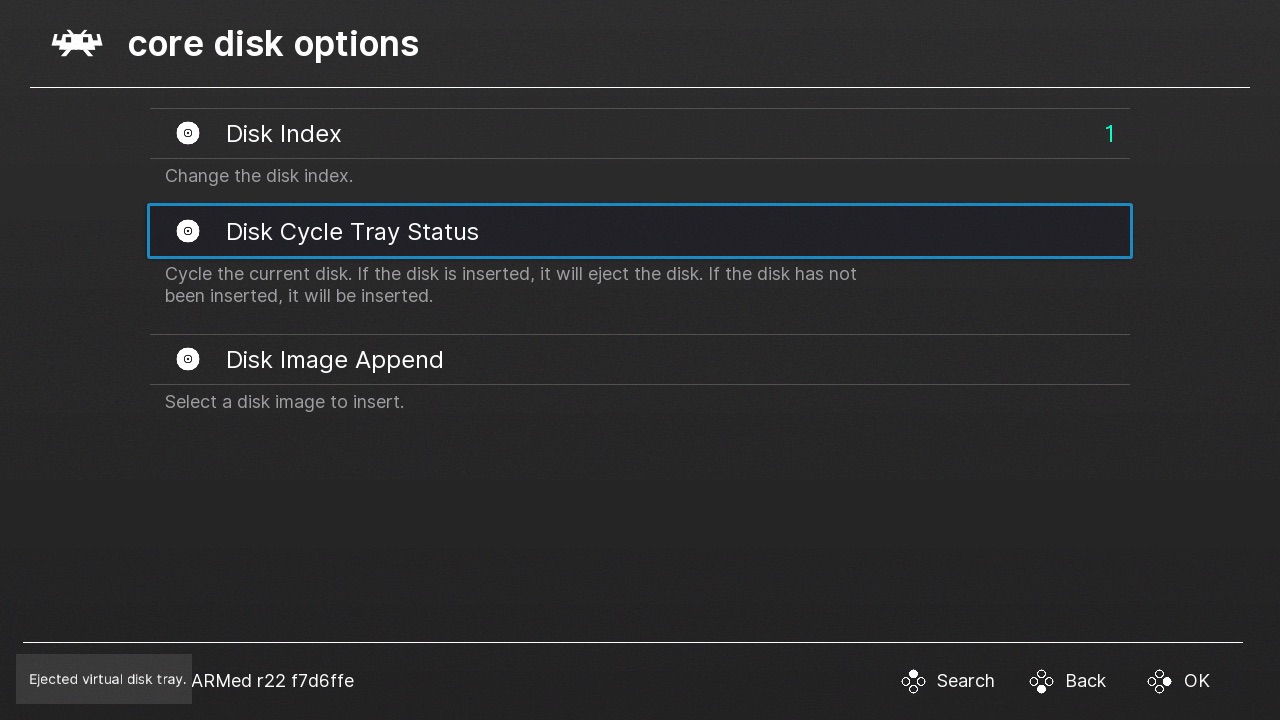
1. When the game prompts you to switch discs, press start+select to open the Retroarch menu and go down to Disk Control.

2. Then press on Disk Cycle Tray Status - you should see an "Ejected virtual disk tray" message on the bottom-left corner.
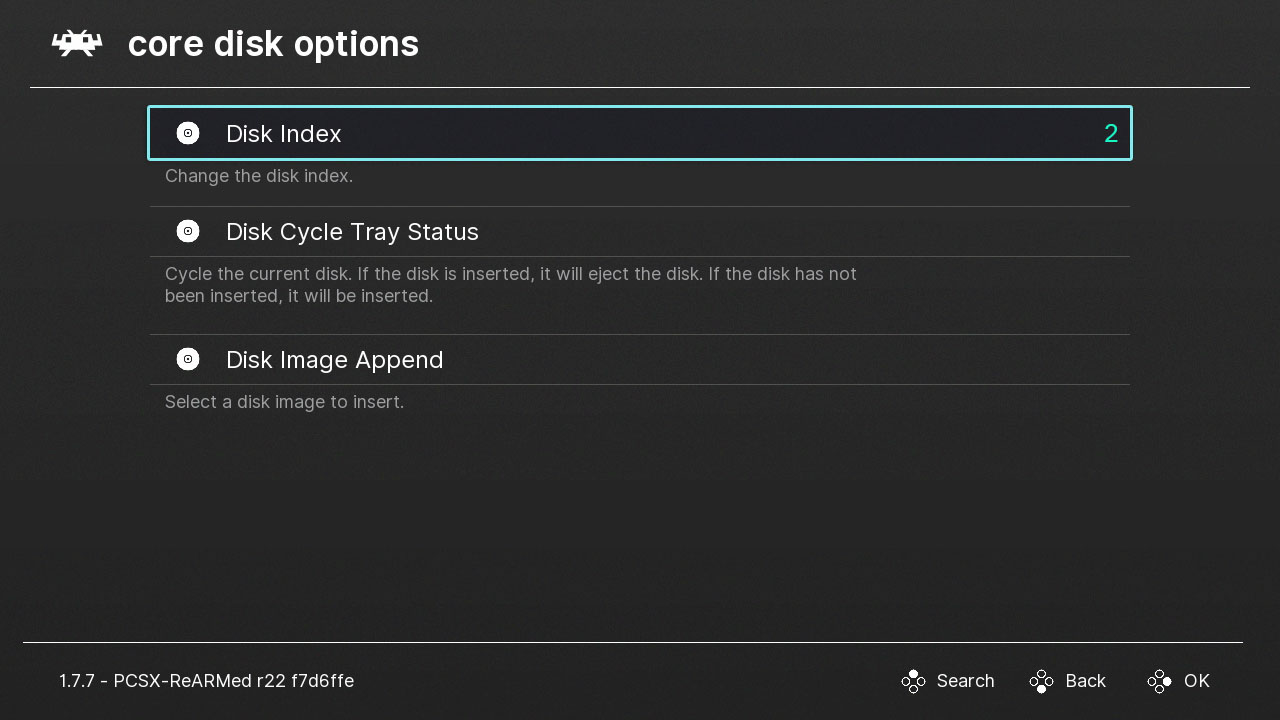
3. Go to Disk Index and change the CD number using the left or right button on your controller.
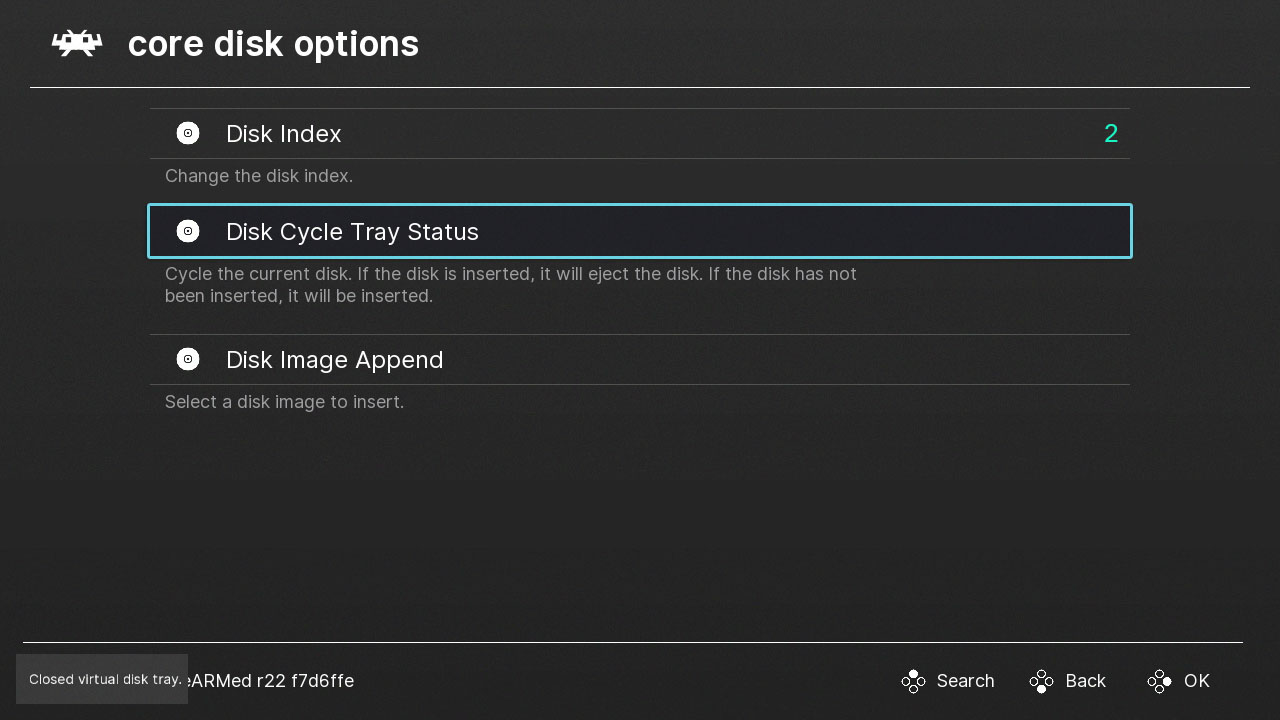
4. Now press on Disk Cycle Tray Status again - you should see a "Closed virtual disk tray" message on the bottom-left corner.
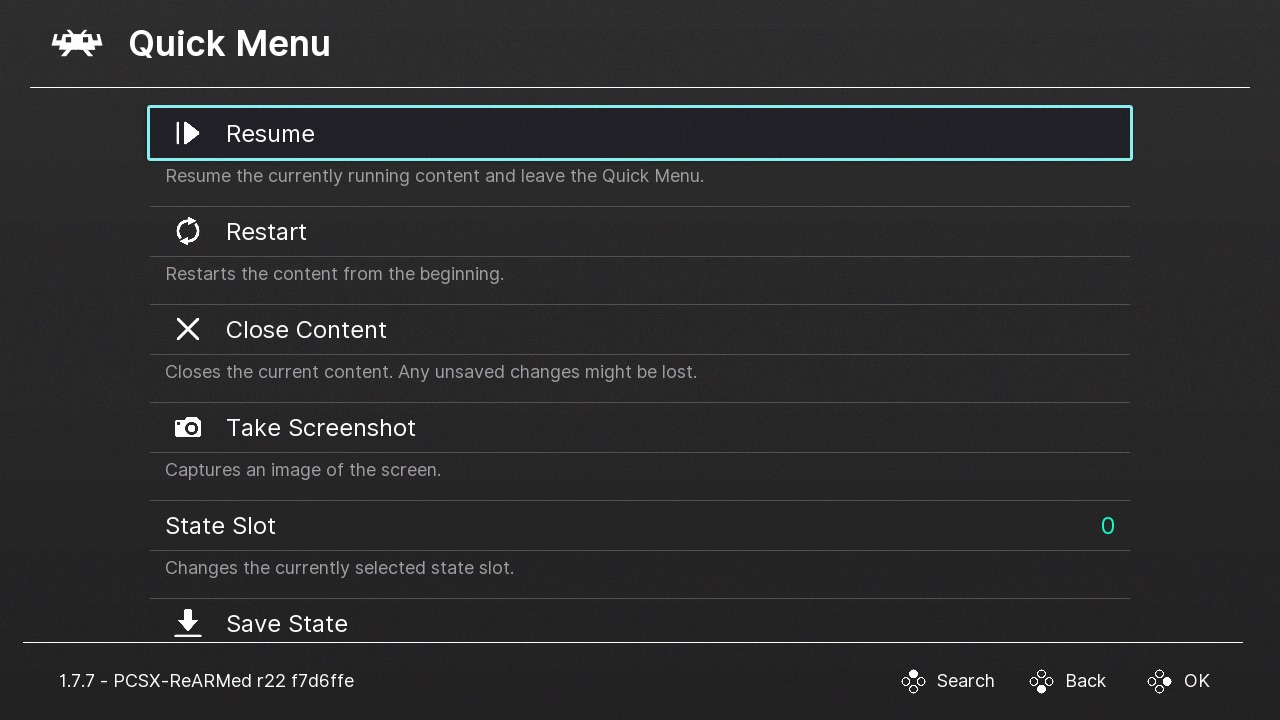
5. Go back and hit Resume. The new disc will now load.
How-to Add BIOS Files
Are you having problems running PS1 games on your SNES Classic? Well, adding PS1 BIOS files to your console can improve performance, correct audio issues, and even make non-working games run. Learn how to install BIOS files to your SNES Classic. We do not provide any BIOS files.
1. Run hakchi2 CE then connect your console to your computer and turn it on. Make sure it is Online before you proceed to the next step.
![]()
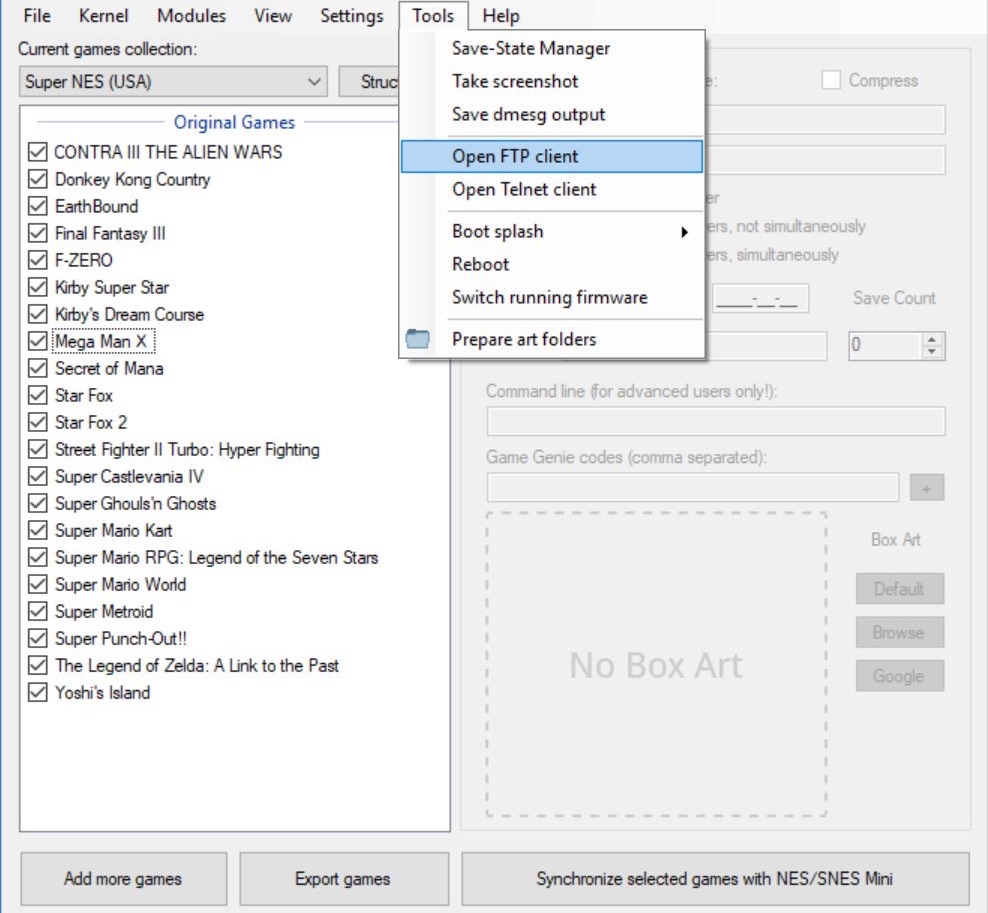
2. Go to Tools > Open FTP client
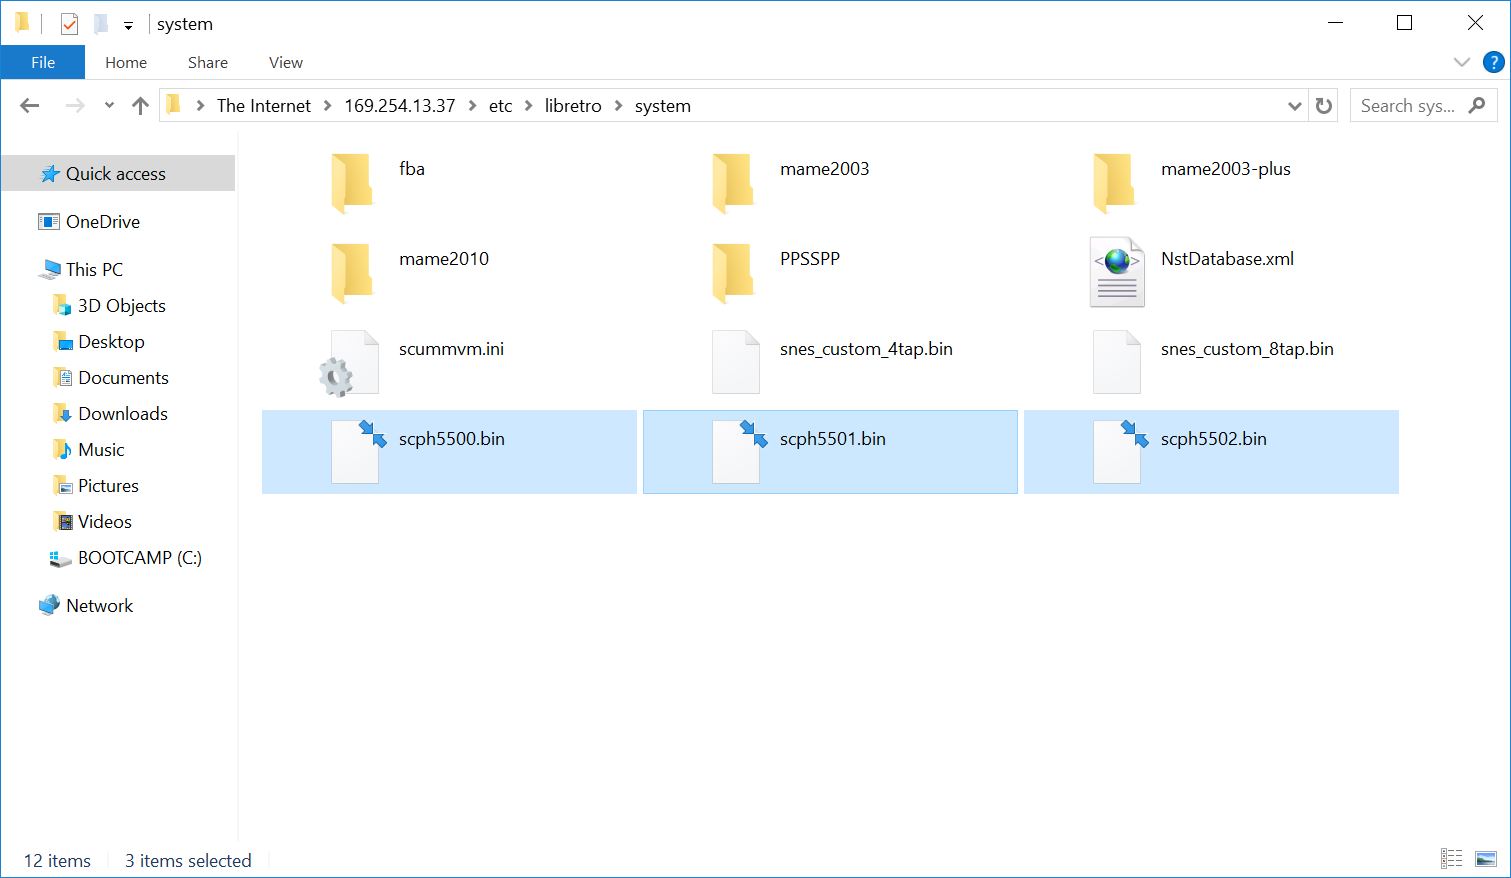
3. Go to etc > libretro > system and copy your BIOS files into the folder. PS1 BIOS files are named scph5500.bin, scph5501.bin, and scph5502.bin.
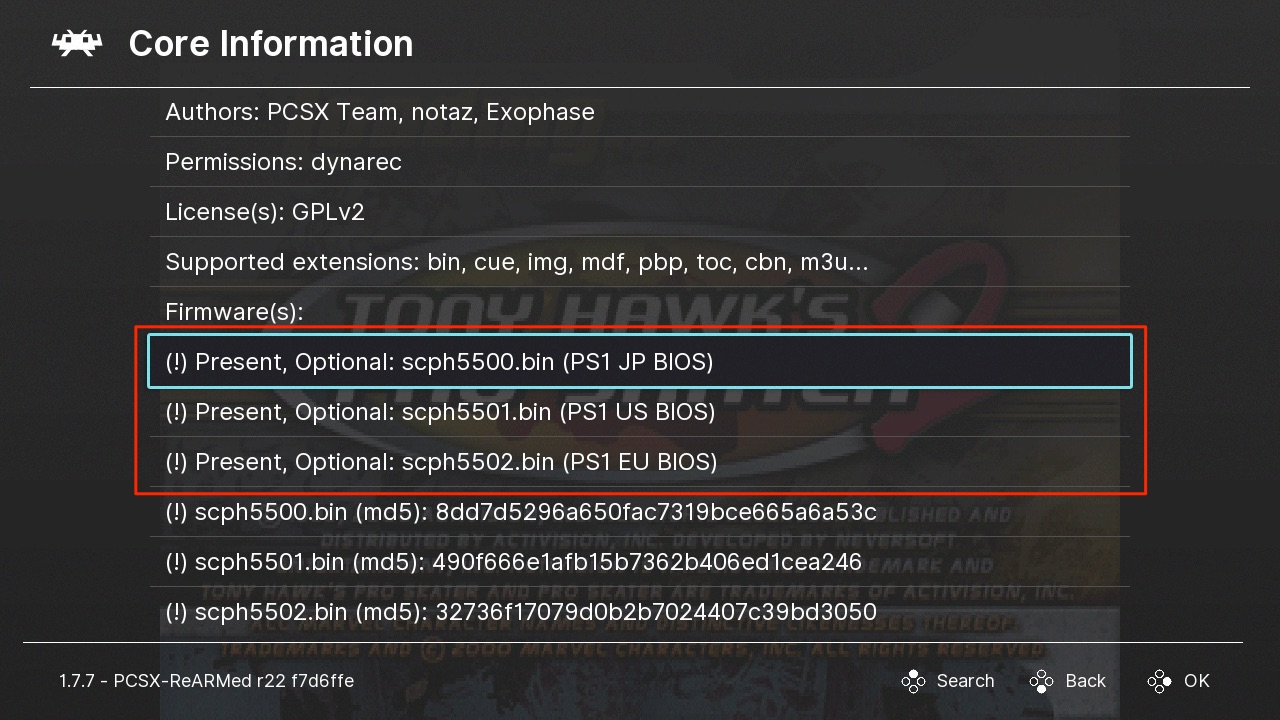
To check if the BIOS files are installed, launch a game and press Start + Select to open the RetroArch menu.
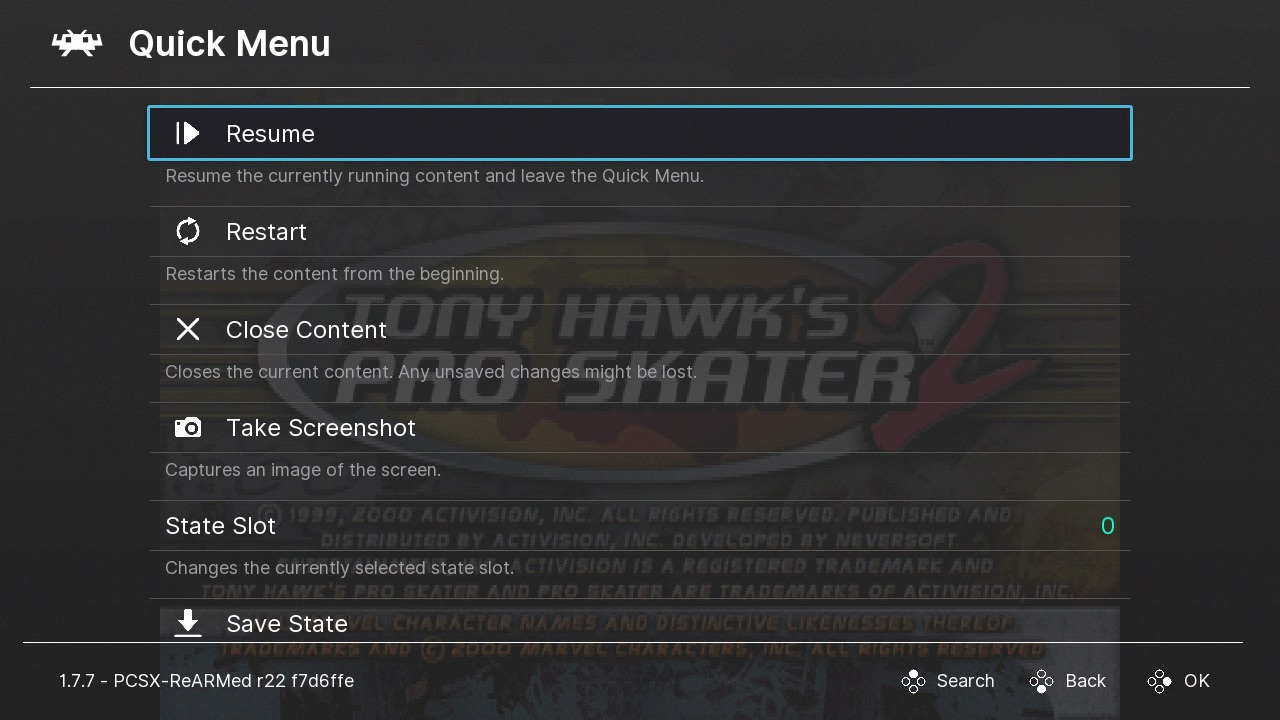
Press B on the control to go back to the Main Menu and go to Information.
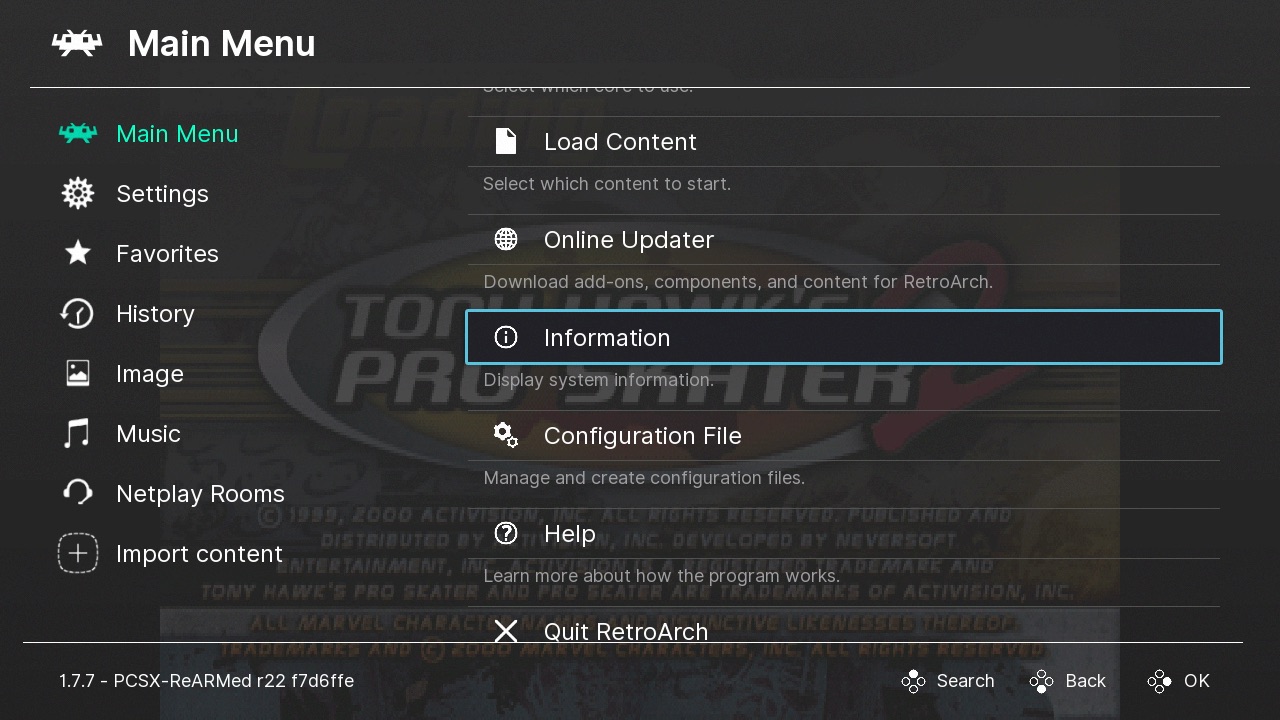
Go to Core Information and go down. Check under firmwares to see if BIOS are present.
Let us now if you have any questions in the comments field below.