Learn how to change the language on the Super Famicom Mini (the Japan's version of the SNES Classic Mini) from Japanese to English.
How-to Change the Language on the Super Famicom Mini to English
If you have already installed hakchi2 CE to your console, connect your console to the computer, turn it on, and open hakchi. Wait until your console is Online then skip to step #5.
![]()
1. Download hakchi2 CE (hakchi2-CE-#.#.#-release.zip) and extract it to your computer.
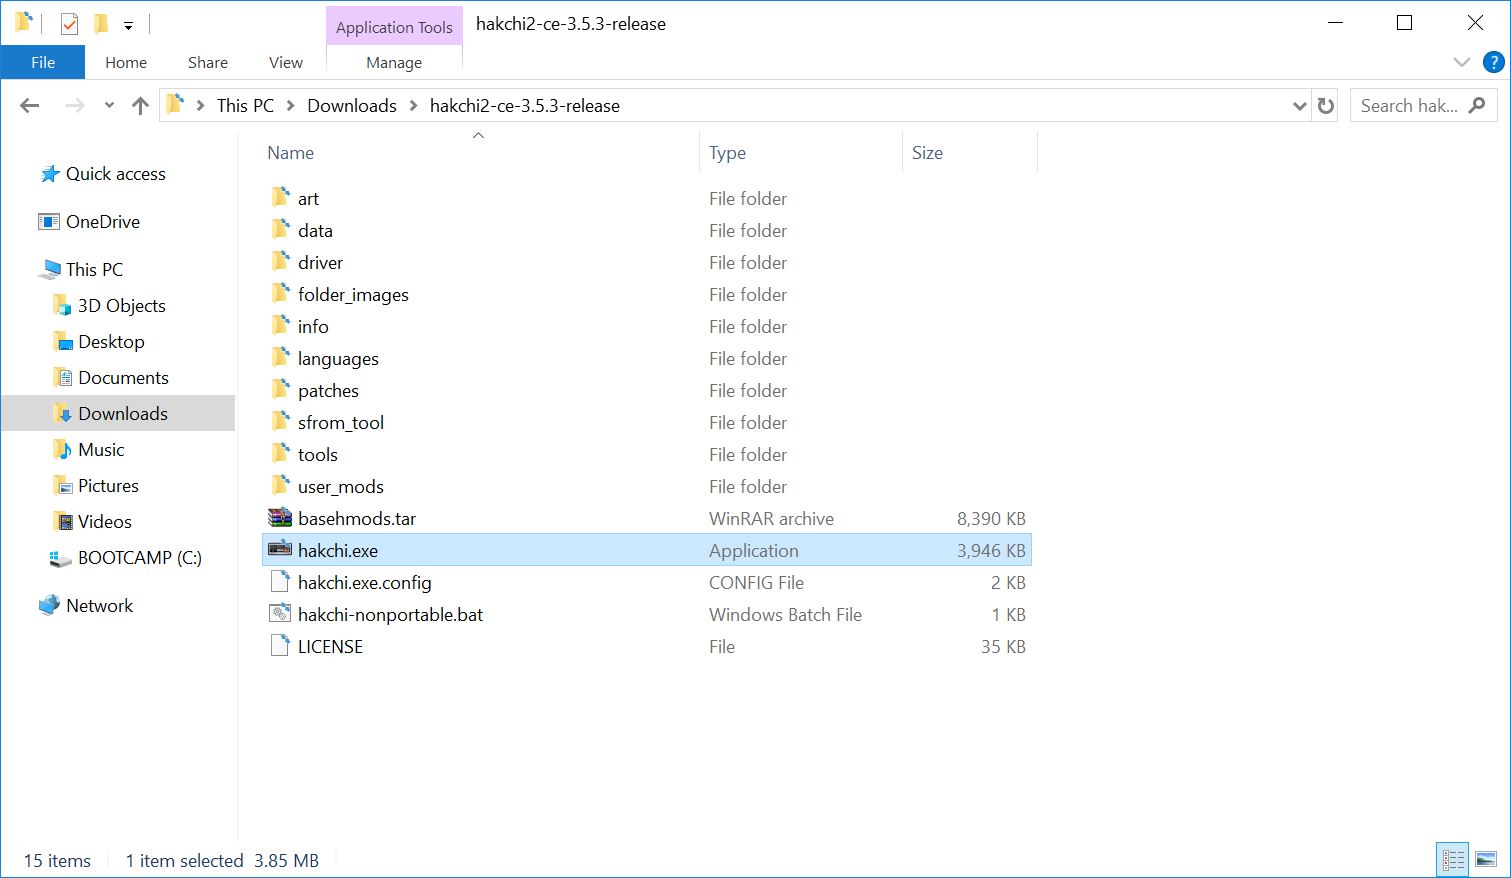
2. Run hakchi.exe.
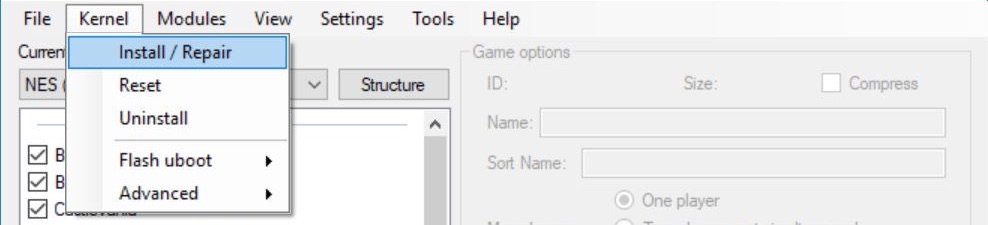
3. Go to Kernel > Install / Repair and hit Yes.
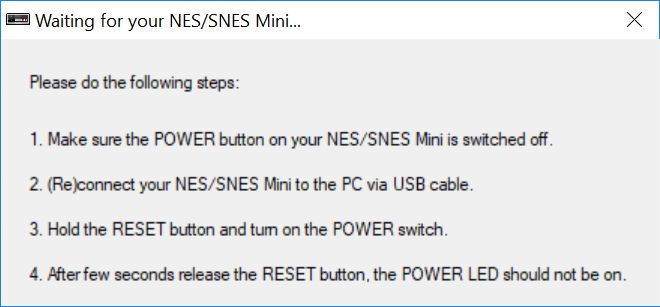
4. If this is your first time, you will be prompted to install drivers. You will only need to do this once. Now follow the steps on the screen - connect your console to your computer, hold the reset button and turn on the power switch, and then release the reset button after a few seconds.
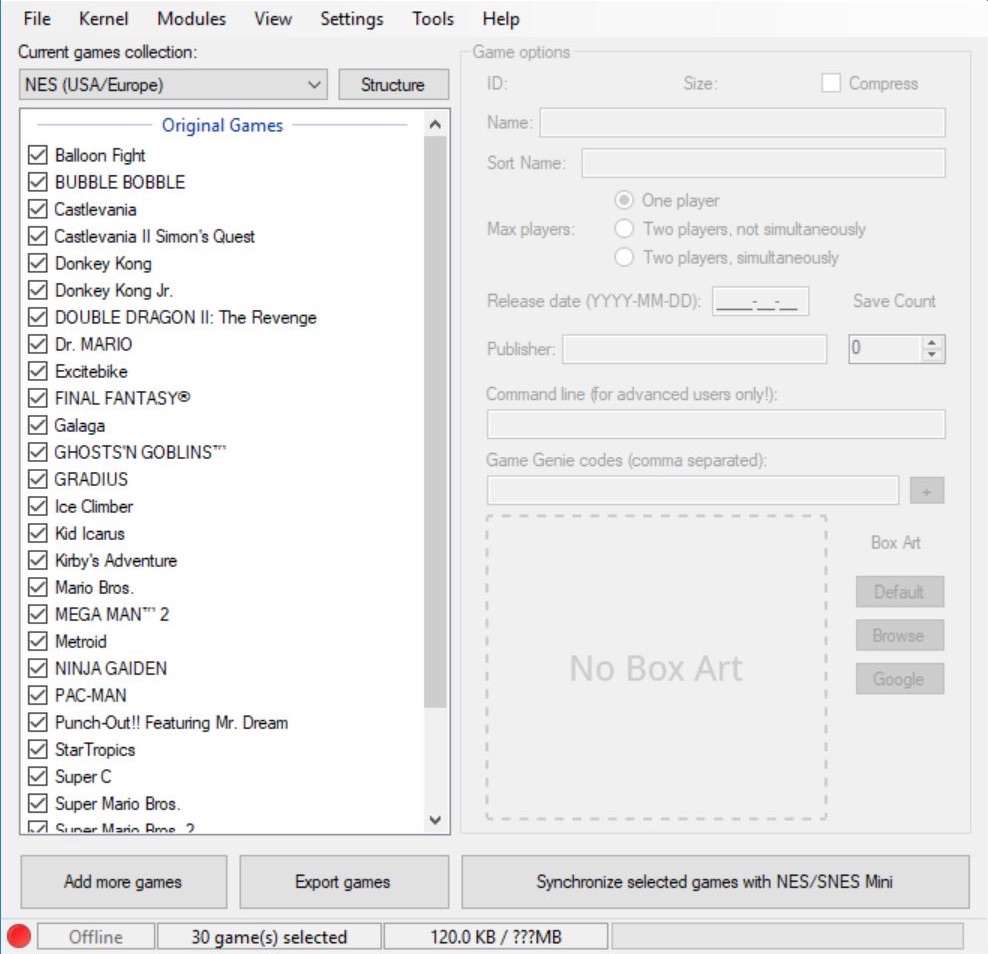
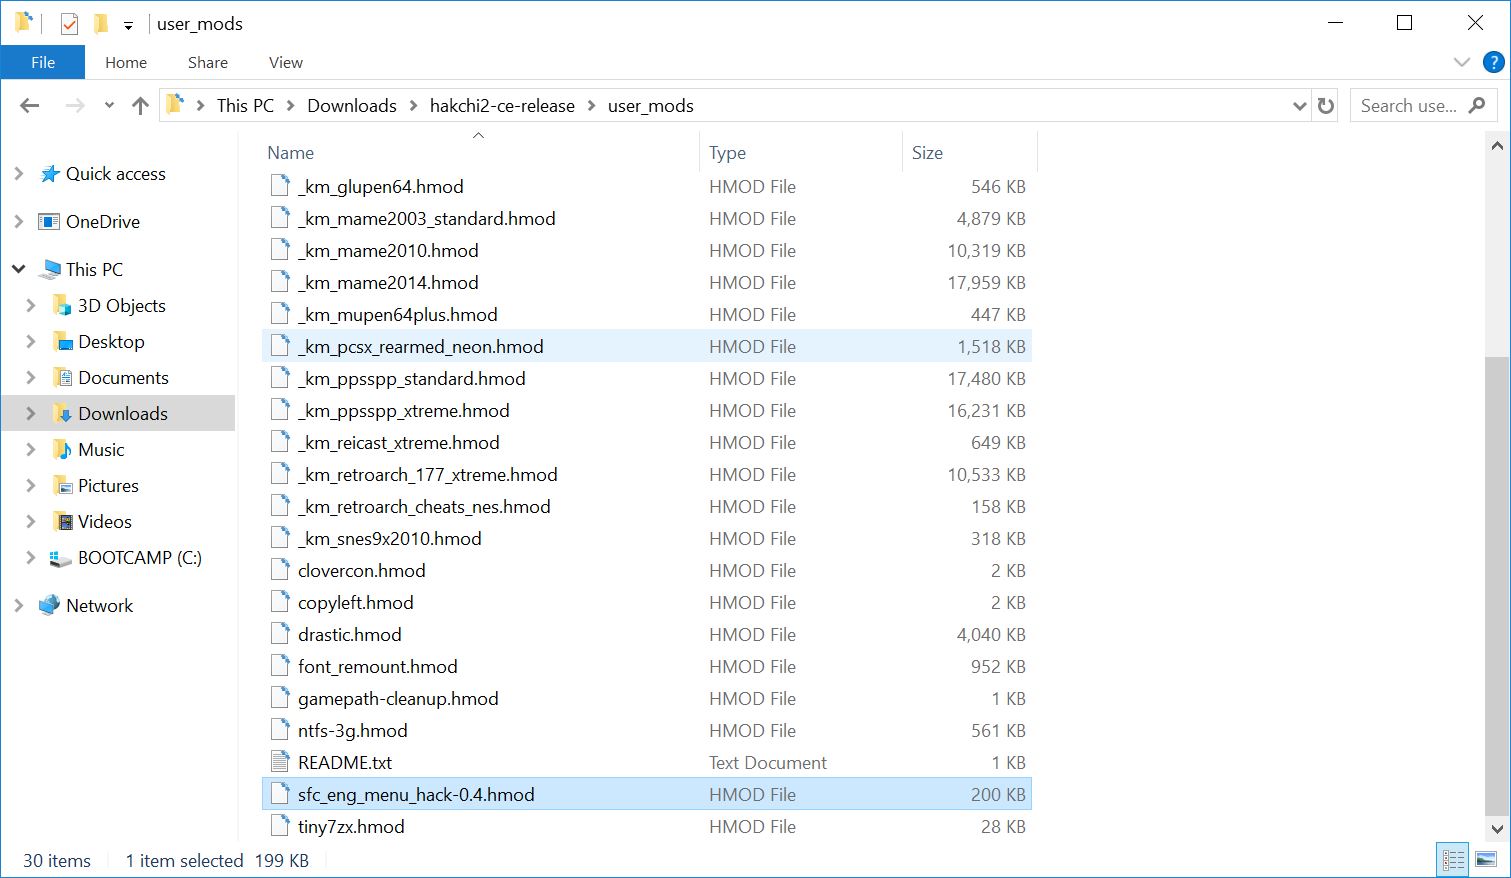
5. Download the english mod and put the file into the user_mods folder inside the hakchi2 folder.
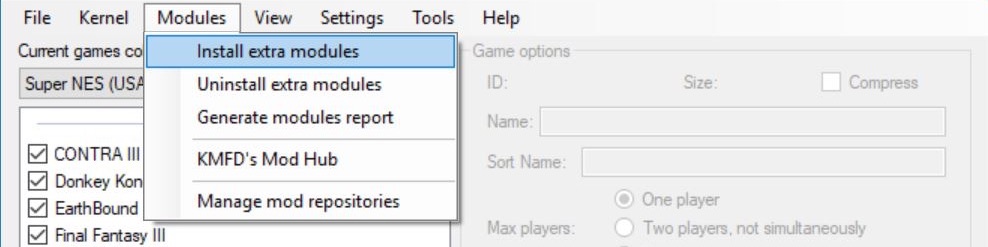
6. Go to Modules > Install extra modules.
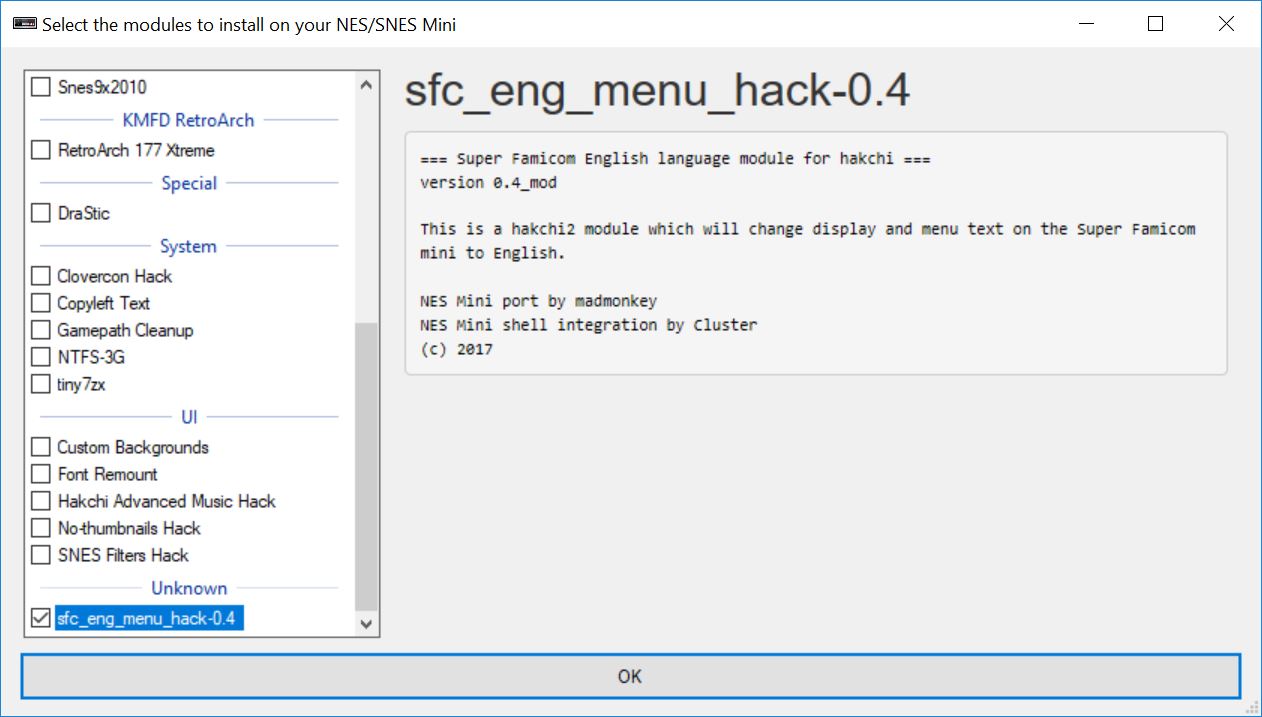
7. Select sfc_eng_menu_hack-0.4 and hit OK.
It will begin to install the module. Your Super Famicom Mini will now be in English (the Japanese game titles will still be the same).
If you have any questions, let us know if the comments field below.